Showing posts with label gluten free. Show all posts

Tuesday, October 22, 2013

Fruit and Veggie Smoothie


My oldest daughter is just getting over strep throat and my husband and I have been doing the best we can to stay healthy.  I mentioned the other day that we really try to boost our fruit and vegetable intake when we are fighting off a bug.  I've also been reading Eat to Live by Joel Fuhrman, and it has really been making me think that I need to do even more to increase my leafy green vegetable intake.  Fuhrman ranks foods using a scoring system he devised called ANDI (aggregate nutritional density index), running from a low of 1 to a perfect score of 1000.  He looks at both the amount of nutrients a food has as well as the amount of calories in that food.  Guess which food scores a perfect 1000?  Kale.  Spinach has a high score of 707, while foods like cola and fries score only 1 and 12 respectively.  A fact that has been in my head as I plan meals this week:  Fuhrman suggests that every person should be eating about one pound of raw vegetables and one pound of cooked vegetables each day.  As I increase my veggie intake (nowhere near two pounds daily), I notice that I don't have room for other stuff that is less nutrient dense.

We juice fruits and vegetables occasionally, but I really like to make this fruit and veggie smoothie to boost my intake.  I prefer it over the juice because it retains all of the fibre from the produce and fills me up.  When I have a smoothie, I usually have it for breakfast.  My husband prefers a smoothie as an evening snack. The key to this smoothie is the banana.  You MUST use a banana or you will taste the spinach or kale. The spinach offers a smoother consistency and you will really not taste it at all.  It is a good place to start with a veggie smoothie.  Once you have tried the spinach, I really suggest you try the kale!  It requires more blending and makes for a slightly rougher texture.  You will taste a bit of "green" flavour, but my daughter has been drinking these smoothies since she was a toddler and has never turned her nose up at it.  I have an old, cheap blender and it does a fine job on this smoothie.  I'm sure if you had a Blendtec or Vitamix it would be even better!
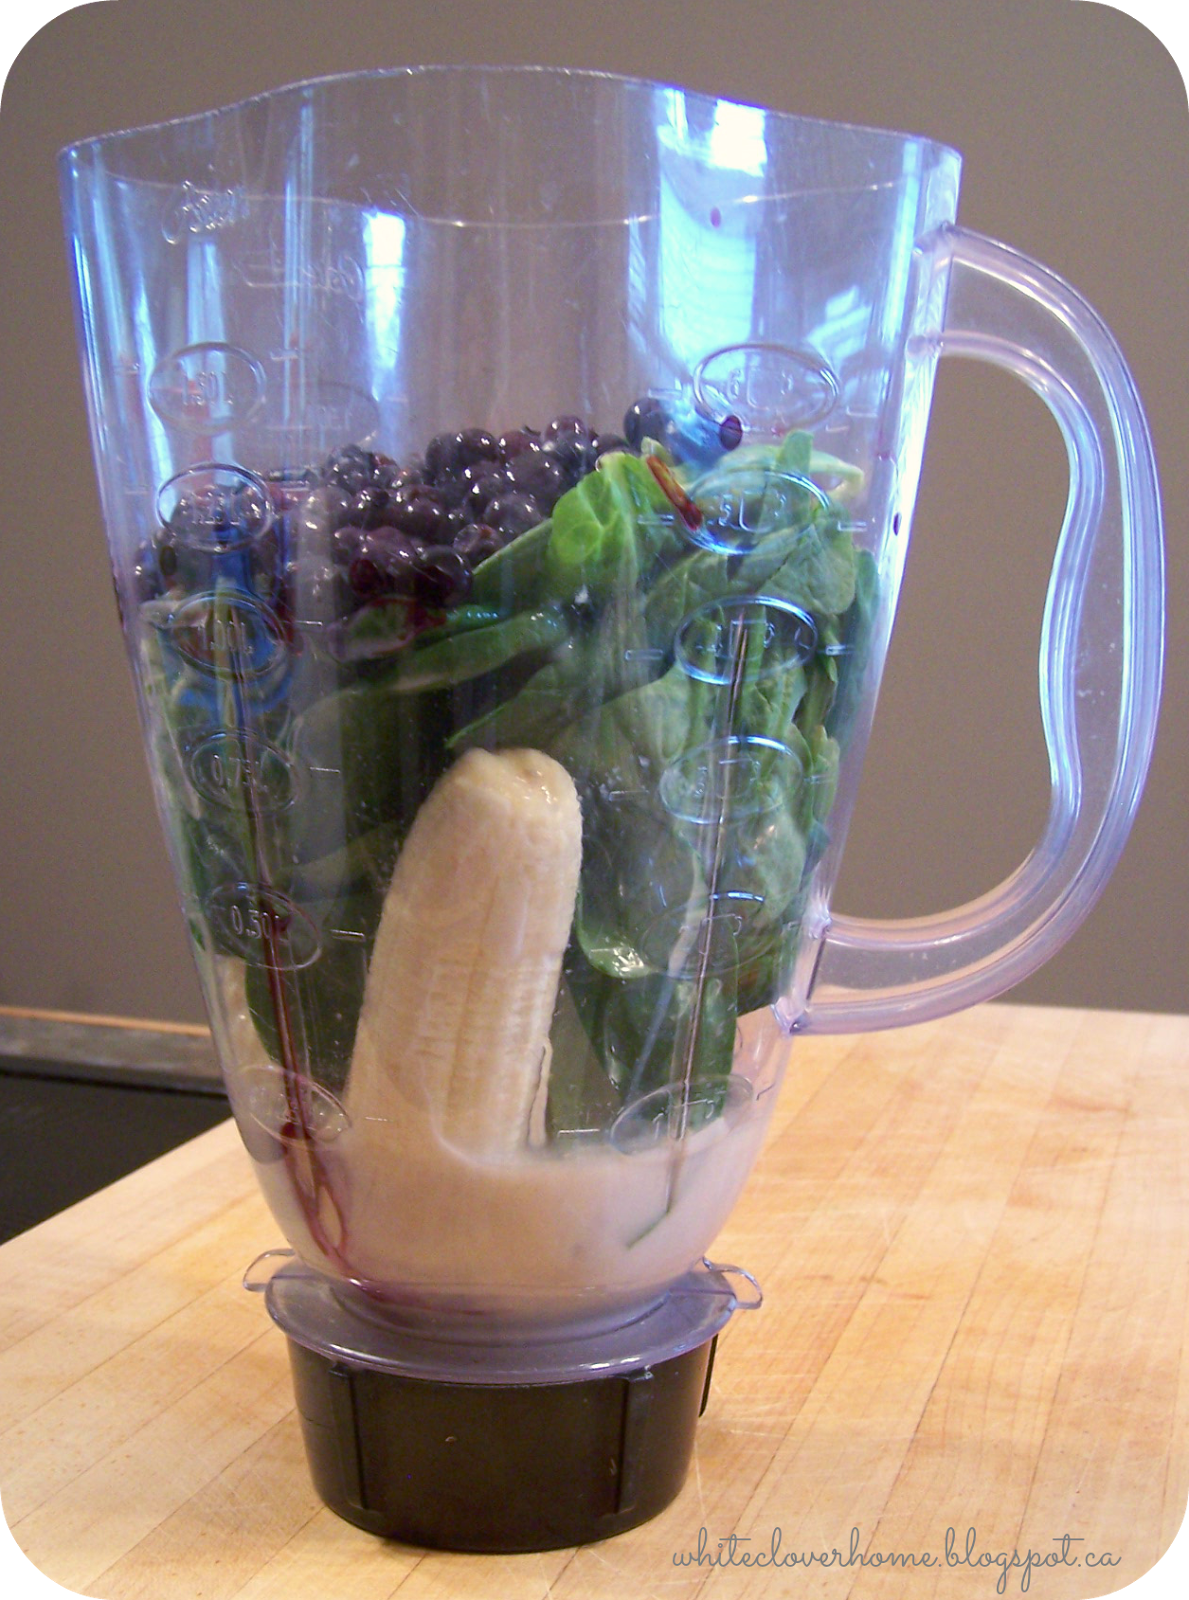

Fruit and Veggie Smoothie

  • one very ripe banana, fresh or frozen
  • a giant handful (about 2 cups loosely packed) of baby spinach, OR 1 cup of loosely packed kale leaves, stems and any tough bits removed
  • 1 to 2 cups of other fruit - fresh or frozen.  If using frozen, I prefer to thaw the fruit partially first to allow more flavour to shine through.  Good choices are any berries, mango, peaches, and kiwi.
  • at least 1/2 cup milk or non-dairy milk
  • other add-ins of your choice.  I always use 2 tablespoons of ground flax, but have also used matcha powder, probiotic powder, and protein powder.  You can also add up to 1 cup of yogurt if you eat dairy.
Place banana in the blender, followed by the spinach and fruit.  Top with your add-ins and pour milk over top.  Blend for ten seconds.  Then you will need to push down on the contents with a spoon and blend again. Add more milk if needed to get things really going.  Once the contents are blending well, blend for another minute or so, especially if you are using kale.  Serves 2 (or one for a huge breakfast if you're me....)

post signature


Shared at:
Sugar Bee Crafts, My Uncommon Slice of Suburbia, A Bowl Full of Lemons, Elizabeth and Co, Not Just a Housewife, Funky Polka Dot Giraffe, New Nostalgia, Homework, A to Zebra Celebrations, Cupcakes and Crinoline, The Breezy Birdie

Sunday, October 20, 2013

Gluten Free and Paleo Banana Muffins


I have always been a baker since I was a teenager.  The first things I remember baking on my own were brownies and pineapple upside down cake from an old, thick cookbook of my mother's.  In my late teens I was on the quest for the perfect chocolate chip cookie recipe, one that was soft and chewy that flattened as it baked.  The quest finally ended with a recipe found in a Canadian Living magazine. It is still the "go to" chocolate chip cookie recipe for my mother and sister.

In my adult years, I baked various kinds of breads and perfected baked cheesecakes with smooth, uncracked tops.  I loved to bake, and rarely bought baked items from the store.  Then, about six years ago, my daughter was diagnosed with Celiac Disease and I had to relearn everything I knew about baking.  All of my "go to" recipes were useless to me.  I tried many gluten free recipes that went straight into the garbage after trying one bite.  Many of these recipes had been published in cookbooks and I had followed the recipe with perfect precision.  I wonder if the cookbook editors even tried the recipes.  After three or four years, I had some decent, new gluten free "go to" recipes.  I knew a lot about gluten free ingredients and different baking techniques.  Still, one limitation of most gluten free recipes was that they went stale very quickly, and had to be frozen within 12 or 18 hours of baking to retain any freshness.  Even then, many items were crumbly once thawed.

Lately, this downfall of gluten free baking has changed for me - mostly thanks to the Paleo food movement. I am interested in Paleo cooking, in that - it's grain free, which is great for our gluten free family - and my husband is very much a carnivore.  So many of the recipes will appeal to him.  (I am mostly a vegetarian, not necessarily for compassionate reasons, but more for the environmental and health benefits.)  Reading Paleo cookbooks introduced me to coconut oil and flour.  These ingredients have helped me to create some pretty amazing muffins that stay fresh and moist - for days on end!

I slowly developed these muffins after making the muffins in Practical Paleo.  While the muffins in Practical Paleo are absolutely amazing, they didn't appeal too much to a child's taste buds.  After a few months of switching this and that, this is what I came up with.


Gluten Free and Paleo Banana Muffins

Makes 12.  Preheat oven to 350 degrees Farenheit.
  • 6 eggs
  • 1/2 cup honey
  • 1/2 teaspoon baking soda
  • 1/4 teaspoon salt
  • 1 teaspoon vanilla
  • 1 teaspoon cinnamon
  • 1/4 cup melted coconut oil
  • 1/2 cup coconut flour, preferably sifted
  • 1 large ripe banana, diced
  • 1/2 cup chocolate chips (optional)

Mix first six ingredients in a bowl.  Whisk well.  Add in melted oil while whisking.  Otherwise the oil may solidify in a chunk within the batter.  Not good.  Add in coconut flour and whisk well until there are no lumps.  Fold in bananas and chocolate chips (if using).  Scoop into a muffin tin lined with muffin papers. Bake for 20 minutes or until an inserted toothpick comes out clean.  Cool on a baking rack.  Once cooled, store up to four days on the counter in a sealed container.  May also be frozen.

You could also try maple syrup or agave syrup in place of the honey, although I have never tried this. To be honest, I never sift the coconut flour, but instead whisk and whisk and whisk until the lumps are gone.  The coconut flour is amazing - after a minute or so, it kind of slurps up all of the liquids, creating a thick batter.  I get mine at Costco (only 7.99 for 2 Kg!) or at Bulk Barn (a bulk food store in Canada).

These muffins don't last long in our house, and I have been baking about three batches a week!

post signature


Shared at:
Three Mango Seeds, Creating My Way to Success, Clairejustine, DIY Home Sweet Home, Be Colorful, Skip to My Lou, An Original Belle, Cherished Handmade Treasures, A Bright and Beautiful Life, Diary of a Real Housewife

Thursday, October 10, 2013

Gluten Free Beginnings


My oldest daughter was diagnosed with Celiac Disease when she was only eighteen months old.  She came down with a terrible flu at sixteen months and could never gain back the weight that she had lost.  She had big, dark circles under her eyes and a large distended belly with skinny arms and legs.  It took three trips to my family pediatrician to convince him that something was wrong.  I had already guessed that it was Celiac Disease before the third visit.  Finally at this visit, he took me seriously and sent us for blood work.  When her liver enzymes were extremely elevated, he arranged an appointment for us in the GI clinic at a children's hospital within a week.  Later that month, an endoscopy confirmed a diagnosis of Celiac Disease.

Looking back, I am so glad that she was diagnosed at a young age.  She doesn't remember that she used to eat food containing gluten, and is used to the textures and tastes of gluten free baked goods such as breads, crackers, and muffins.  If she had been diagnosed at an older age, I think she would have been resistant to try these foods.  Luckily for us, she is not a picky eater in the least.  This makes cooking gluten free meals so much easier.  We always eat gluten free dinners in our home and everyone eats the same thing.  My husband and I will eat gluten containing items in our lunches or for breakfasts, while our daughter has a gluten free substitute.  Lunches and breakfasts are not really planned meals in our home.  For breakfast, everyone eats what they feel like that day, choosing from toast, cereal, eggs, yogurt and fruit, or whatever else might be around that week.  Lunches are usually packed for work or school.  On weekends, we often have leftovers from our gluten free dinners.

"Gluten Free"  seems to be a buzz term lately.  So many people are trying out a gluten free diet in hopes of alleviating digestive upsets, skin problems, ADHD symtoms, and more.  Knowing that our family has been cooking gluten free for years, I get a lot of questions about recipes, products, and meal planning.  Families with young children often ask us how we make packed school lunches that a child is willing to eat.  I have often written the same email out to friends and acquaintances, sharing the information that I have collected over the years.  I think that someone out there will also find our information useful, and I will start sharing it in occasional posts.


To start, I thought I'd share some basic information that often gets overlooked when your family is beginning to go gluten free.  I am not a dietitian, doctor, or nurse.  These are just things I have learned through the years, and are by no means a complete guide on going gluten free.

  • Read labels carefully!  Gluten can be found in wheat, rye, barely, and oats (usually contaminated with wheat).  The label may not always say these words.  Watch out for terms like food starch, malt, and ambiguous words like flavouring.  I referred to this list often when starting out.
  • If you're not sure, call the company.  I know companies like President's Choice will tell you if the product is gluten free and if there are gluten containing products made on the same line.  I have called from my cell phone while standing in the grocery store.
  • Talk to others who are holding parties about the menu so you can bring substitutes.  Offer to bring a dish to the meal.  I usually bring a gluten free dessert that is usually (mostly) gluten free anyway - such as a cheesecake with a gluten free cookie crumb crust.  This way everyone can enjoy the same dessert without feeling as though they are eating something odd or weird.  I bring my daughter a cupcake to birthday parties.
  • For children, ask the teacher to keep boxes of extra treats and snacks at school.  This way if someone surprises the class with a treat, your child doesn't go without.  We usually send in a box of fruit snacks and a box of granola bars.  Individually wrapped is best.  We ask the teacher to let us know about planned treats and send something similar.
  • For children, watch out for school activities.  Playdough contains gluten, as do some brands of glue. Our specialist advised us to avoid touching items with gluten since it can be absorbed by the skin.  However, I have heard of other medical professionals offering different advice, so always ask your doctor.  I offer to bring in pasta for crafts or ingredients for class cooking activities.  We make gluten free playdough ourselves, but it's hard work!  Be warned:  I have never used a recipe that worked as written, and each one worked differently each time!  I always end up adding more of this or that to get it to come together.  We have broken a wooden spoon stirring it since it gets so tough.
  • We have a book that is great for your children to bring to school called, Eating Gluten Free with Emily.  It explains Celiac Disease very well in a way that little ones can understand.
  • We rarely eat out.  It just makes me nervous.  I have heard many stories about kitchen mix ups or misunderstandings resulting in someone getting sick.  When we do eat out, we tend to go somewhere that has a separate gluten free menu.  This makes me feel a bit safer knowing that they have some sort of base knowledge and are making an effort.  When at the restaurant, I explain to the server that my daughter has Celiac Disease and ask that they let the cook staff know to be extra cautious while preparing her food to avoid cross contamination.  I am always polite and everyone has always been wonderful about it.
  • We don't travel a lot. When we do, I plan places to eat before we leave home.  I do research on the internet and call restaurants to check out our options.  We always travel with a lot of fruit, yogurt and snacks in a cooler.  When we went to Disneyworld, they were phenomenal and I felt completely safe eating there.  At almost every restaurant, the chef came out to talk to us and arranged our meal, complete with gluten free desserts.  If you email them, they will send you a list of gluten free foods available at each park.


There are even more concerns if you are going to have some family members go gluten free while others consume gluten.  This is a controversial subject, and many think that you are not truly safe unless there is no gluten in the home at all.  We are very careful in our home and my daughter has never gotten sick.  Every blood test has come back clean and has not indicated that she has fallen victim to cross contamination.  She is very good to check her eating area at school for crumbs, and has even refused to eat an item in her lunch that she has never had before in case it contained gluten! Now I show her new things before putting them in her lunch so that she knows they are safe for her to eat.
  • Keep a tidy kitchen if some family members are going to keep eating gluten.  Even one crumb can make a person very ill. We often use paper towels, plates, or cutting boards under food prep areas to catch crumbs and contaminants.
  • Have separate toasters, one for gluten free bread and the other for regular bread.  We even bring our gluten free toaster with us when we stay somewhere overnight.
  • Wash all dishes and utensils thoroughly!  Running items through the dishwasher is thought to remove gluten.  Some families have separate eating and cooking utensils, although we do not.
  • We only bake with gluten free ingredients.  I do this because flour and other baking ingredients always seem to get everywhere and are so easy to accidentally ingest.  I figure we are much safer just to keep them out of the house.
  • Label, label, label!  We buy doubles of anything that needs to have a knife or spoon dipped into it. The gluten free container is clearly labelled gluten free in several places with a Sharpie.  We buy doubles of margarine, jams and jellies, relish, mustard, mayo, etc.  
  • We use many utensils.  Once it has touched gluten, it goes into the sink.  No chances for double dipping or cross contamination!
  • Explain how things work in your kitchen to guests.  I have had to be kind of rude to my in-laws at times in order to ensure that things stay safe in our kitchen.  Explain, explain, and explain again.  Sometimes I feel as though others think I am being paranoid or overly cautious, but they need to know that just one crumb can cause my child to become very sick.  I have also turned down offers from others to help in the kitchen during holiday meals, knowing that it is just faster, easier, and safer to do it myself than guide someone through everything.  Having said that, my sister and mother really get it and are wonderful help.  
Next week, I will share our weekly meal plan and some recipes that we often use.  The beginning is the hardest part about going gluten free.  Once you get into the swing of things, it gets much easier!


Shared at:
The Crafty Blog Stalker, A Creative Princess, Gingerly Made, Someday Crafts, Ivy and Elephants, The Craft Guild, We Like to Learn as We Go, A Glimpse Inside, My Romantic Home, Chic on a Shoestring Decorating, Happy Hour Projects


Follow my blog with Bloglovin

Wednesday, October 2, 2013

Weekday Soup


For a few years, we rarely ate soup at our house.  Our oldest daughter had been newly diagnosed with Celiac Disease and we were transitioning to a gluten free diet in our home.  All of the soups that we were used to buying contained gluten, and so they were out of the picture.  I was slowly moving towards making more and more of our foods from scratch, but soup was not one of them.  As a mother who worked full time and had to cook every night to make sure that our meals were completely gluten free, I was not prepared to spend my weekends cooking soup.  I mean, that would take forever.  Right?

Maybe not.  At first I began to cook big batches of soup on weekends and freeze them in meal sized portions to take out and thaw for weekday meals.  I still do this for more time consuming soups such as pea soup and the very labour intensive borscht that I make twice a year.  However, I now also make soup from scratch on a weekday after work.  From start to finish, it's ready in an hour.  Of that hour, most of the time is spent simmering on the stove while we do homework, tidy up or just relax.  In the fall and winter months, I make this soup about once a week.  It is fast and versatile - perfect for using up whatever veggies you have in the pantry or refrigerator.


Weekday Soup

1 cup diced onion
1 cup diced celery
2 tablespoons olive oil (or oil of your choice)
3 cloves minced garlic
2 cups diced carrot
6 cups stock or broth (chicken, veggie, beef, whatever you have around)
1 large can tomato sauce (the ones I use are about 2 and 1/2 cups)
1 cup frozen peas
1 teaspoon dried thyme
1 teaspoon dried oregano
salt and pepper to taste
Other add ins: 1 cup corn kernels, 1 or 2 cups shredded cabbage, 1 cup diced zucchini, 1 cup baby spinach leaves, etc.

Heat oil in a large pot over medium high heat.  Add in celery, onions and carrots.  Stir every minute or so.  Once the onions are cooked, add in garlic.  Cook for one minute.  Add in broth, tomato sauce, oregano and thyme.  Cover.  Reduce heat to low and allow to simmer for 20 minutes or until carrots are almost cooked.  Add frozen peas and any other add ins you like.  Bring to a simmer again.  Allow to cook for five to ten minutes or until the peas and add ins are cooked to your liking.  Add salt and pepper to taste.

I have also thrown everything in the slow cooker and allowed it to cook for ten hours on low while I was at work, and it turned out very well.  Something else we do is throw in a pound of lean ground beef with the onions, celery and carrots.  Make sure it is cooked through before adding the next ingredients.

At our house, we always eat these with grilled cheese on rye bread for the adults or gluten free bread for our older daughter.  A great and simple dinner on a chilly fall evening!

Shared on:

Hun...What's For Dinner, Sweet Haute, Fireflies and Jellybeans, Two Yellow Birds Decor, Gingerly Made